What Is a Crack Membrane and How Does It Work?

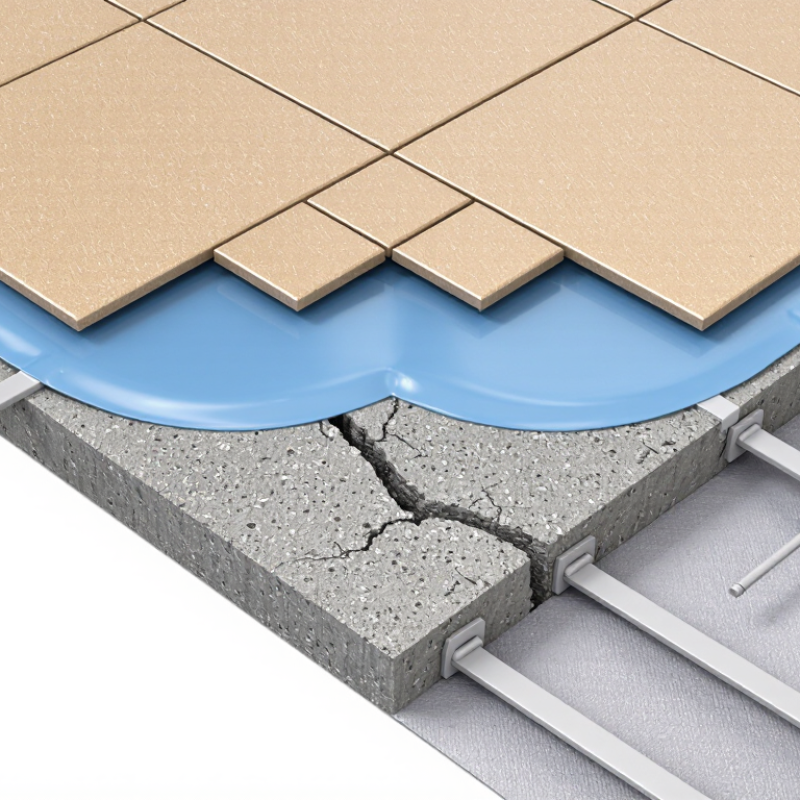
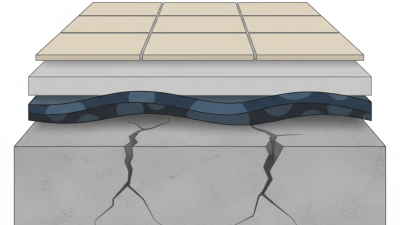
A crack membrane is a flexible layer designed to help protect tile and other finished surfaces when small cracks develop in a concrete substrate. It does not repair the concrete. Instead, it separates the finish from limited movement below. Picture a fine crack running across a basement slab: the membrane forms a bridging layer, reducing the chance that movement transfers directly into the tile.

The exact product matters. Some membranes are sheet-applied; others are liquid coatings that cure into a continuous film. Both depend on sound preparation, correct thickness, and careful treatment at corners, drains, and seams. A missed pinhole can matter. So can dust left beneath the bond. The membrane also has limits: structural movement, active water pressure, or an unsuitable installation may require a different solution. Details decide performance.

A useful technical principle is: “A crack membrane manages movement; it does not make a cracked slab whole.” No source quotation was provided, so this sentence is an original summary—not a statement attributed to a named expert. That distinction matters when assessing building advice. Installation instructions and site conditions should guide the choice, not a product label alone. Even a well-chosen membrane can fail if its edges are left exposed. This is easy to overlook. A closer look at how the layer works can help explain where it fits, what it can protect, and where its limits begin.
What Is a Crack Membrane and How Does It Work?

What a Crack Membrane Is

A crack membrane is a thin, flexible layer installed between a tile substrate and the finished surface. It is designed to reduce the transfer of small cracks in concrete or cement board into tile. Think of it as a buffer, not a repair. That distinction matters.

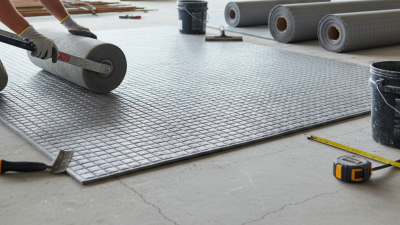
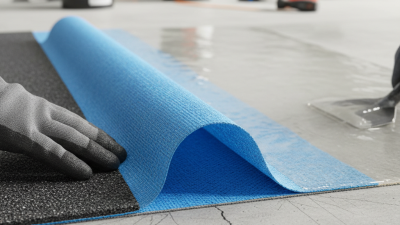
Some membranes come in sheets; others are applied as liquid coatings. Once installed and cured, they form a layer that bonds to the substrate and accepts tile adhesive. If the substrate shifts slightly, the membrane may absorb some movement before it reaches the tile or grout. Its protection is limited. Coverage, thickness, seams, and curing time all affect performance.

Before installation, the surface should be clean, sound, and free of loose dust or paint. A hairline crack may be suitable for treatment, but a widening crack or moving joint needs proper assessment. A membrane is not a cure-all. It is easy to treat it as insurance, but that can be misleading. Some types also provide water resistance; others are intended only for crack isolation. Check the installation instructions for compatible surfaces and required coverage.
Where Crack Membranes Are Used

Crack membranes are commonly installed beneath ceramic or stone tile over concrete slabs with nonstructural shrinkage cracks. Typical locations include kitchens, corridors, retail floors, and institutional interiors. A slab may look sound but still carry a fine crack across its surface. Tile and grout can transfer that movement upward.

The membrane creates a flexible layer between the substrate and tile. It is not a structural repair. Details matter.

ANSI A118.12 evaluates crack-isolation membranes for in-plane movement. Its performance classifications use test thresholds of 1/16 inch (1.6 mm) and 1/8 inch (3.2 mm). These figures describe laboratory performance, not permission to cover active structural cracks.

The Tile Council of North America Handbook treats movement joints as a separate part of tile installation. Such joints must remain accommodated in the finished tilework; a membrane does not replace them. Installers may also use membranes on other approved substrates, following the specified system details.

This step is easy to underestimate. Moisture, crack width, and joint placement can all affect the choice, so site assessment matters.

Materials and Layers in a Crack Membrane System

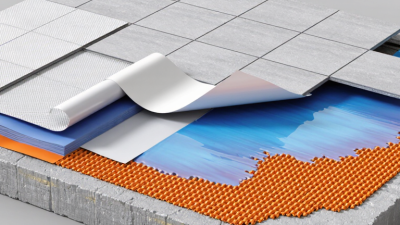
A crack membrane system is built in layers, and each one has a different job. The tile substrate must be clean, firm, and free of dust, loose mortar, or paint. A patching compound may be needed to fill shallow dips, but it should not conceal a moving or unstable crack. Check the surface carefully. Even a thin ridge can show through the finished floor.

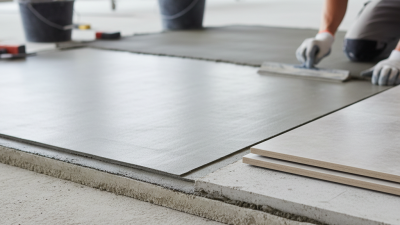
Depending on the system, an installer may apply a compatible primer before laying a sheet membrane or rolling on a liquid membrane. Sheet material needs close, flat contact with the substrate; seams and edges must be treated as specified. Liquid membranes need an even coat and enough drying time. Missed spots matter. Above the membrane, a suitable tile-setting mortar holds the tile in place, while grout fills the joints. The layers work together to reduce transfer of limited, in-plane substrate movement to the tile. They cannot correct structural movement or a poorly prepared surface. It is tempting to rush drying and seam details, but those are the parts worth checking twice.

How a Crack Membrane Accommodates Movement

A crack membrane is a flexible layer installed between a prepared floor and its tile finish. Its job is not to stop a crack from moving. Instead, it helps limit how much that movement transfers into the tile and grout.

When a slab expands, shrinks, or shifts slightly, the membrane can deform in shear. Imagine a thin cushion beneath a rigid tile: the cushion absorbs some sideways strain rather than passing all of it upward. Small shifts matter. The membrane’s flexibility, thickness, and bond to the substrate all affect how well it performs. It cannot accommodate unlimited movement, and a structural crack that continues to widen may need professional assessment before tiling.

Installation details are important. Dust, loose concrete, or an uneven coating can weaken the bond and create a failure point. The surface should be clean and sound, and the membrane must be applied at the specified coverage and thickness. I would not treat a membrane as a substitute for movement joints; those joints still allow larger areas to expand and contract. There is also a practical uncertainty: two hairline cracks can look alike, yet behave differently as seasons and indoor conditions change. A membrane reduces risk, but it does not promise a crack-free floor.

Installation Factors and Performance Limits

A crack membrane works only as well as the surface beneath it. The concrete or cement board should be sound, clean, and free of dust, oil, and loose material. Even a thin layer of grit can create a weak spot. Check moisture conditions and surface preparation requirements in the product instructions; they vary by membrane type.

Treat the crack as directed, including any specified gap filling or reinforcing fabric. Apply the membrane at the stated thickness, using a wet-film gauge if the instructions call for one. Thin areas near edges are easy to miss. Keep seams and wall transitions covered, and allow the membrane to cure before setting tile. Rushing that step can trap moisture or weaken the bond.

A membrane can help isolate limited, in-plane cracking, but it cannot stabilize a moving or structurally damaged slab. It may also have limits for crack width, movement, temperature, and exposure to water. Respect existing movement joints; covering them does not make them disappear. If a crack changes width, has a height difference, or keeps returning, get the substrate assessed before installation. There is some judgment involved, and a membrane is not a substitute for fixing the cause.

What Is a Crack Membrane and How Does It Work? – Installation Factors and Performance Limits

Factor Installation Check or Guidance Effect on Performance Performance Limit
Purpose and action A crack-isolation membrane is a layer installed between a suitable substrate and a tile finish. Depending on its design, it helps accommodate limited in-plane movement at certain substrate cracks. It can reduce the transfer of some substrate crack movement to the tile layer when the complete flooring system is installed correctly. It does not make a structurally unsound floor sound, stop ongoing structural movement, or guarantee that tile will never crack.
Crack type and movement Inspect and document the crack before covering it. Determine whether it is stable, moving, associated with a construction joint, or showing signs of structural distress. Membranes are intended for limited movement within the capability of the particular product and installation system. Active structural cracks, vertical displacement, and expansion or movement joints require appropriate assessment and detailing; they should not simply be covered as ordinary cracks.
Substrate condition The substrate should be sound, sufficiently flat, and free of dust, oil, curing compounds, loose material, and other bond-inhibiting contaminants. Follow the product’s preparation instructions. Good preparation supports reliable bonding and helps prevent debonding beneath the tile assembly. A membrane cannot compensate for a weak, delaminating, contaminated, or excessively deflecting substrate.
Moisture and surface readiness Check substrate moisture and surface conditions against the membrane and setting-material requirements. Use a primer only when the system specifies one. Excess moisture or an unsuitable surface condition can interfere with adhesion, curing, or compatibility. Moisture tolerance varies by product. A crack-isolation membrane should not be assumed to provide waterproofing unless it is specifically rated and detailed for that purpose.
Coverage and thickness Apply the specified amount and achieve the required finished thickness using the stated application method and tools. Check coverage rather than relying on appearance alone. Consistent coverage and thickness help the membrane perform as tested and specified. Thin spots, missed areas, excessive thickness, or uneven application can reduce performance or affect tile-setting conditions. Requirements are product-specific.
Crack coverage and detailing Center the membrane over the crack or treat the designated area as directed by the installation instructions. Observe required widths, reinforcement, and edge details. Correct placement helps isolate the treated crack from the tile layer. Required treatment width and detailing differ among systems. A narrow strip or incomplete coverage may not match the tested installation.
Seams, corners, and transitions Where sheets or adjoining areas meet, follow the specified seam overlap, butt-joint, reinforcement, and transition details. Keep the surface free of wrinkles and voids. Careful detailing reduces weak points and supports continuity across the treated area. Improper seams or transitions can create discontinuities. Do not assume that every membrane detail also provides a waterproof seal.
Movement joints Carry existing movement-joint locations through the tile finish and detail them with an appropriate joint system. Follow applicable tile-industry guidance and project requirements. Movement joints allow planned movement to occur at designated locations rather than being forced into the tile assembly. A crack membrane is not a substitute for movement joints and should not be used to bridge expansion joints or other joints that must remain functional.
Curing and tile installation timing Observe the specified drying or curing time before installing tile. Timing can depend on the product, application thickness, temperature, humidity, and ventilation. Installing at the correct stage supports adhesion and helps avoid disturbing or trapping an uncured layer. There is no universal waiting time. Follow the current product instructions and do not rely on surface appearance alone.
Compatibility of system components Confirm that the membrane, primer, tile-setting mortar, substrate, and finish are approved or suitable for use together. Compatible materials help maintain reliable bonding through the full assembly. Mixing unverified materials or application methods can produce results outside the membrane’s tested performance.
Product rating and verification Review the technical data and applicable test classification, such as ANSI A118.12 where relevant to the project and product. Test classifications provide a basis for comparing crack-isolation performance under specified laboratory conditions. A test rating is not a promise of performance under every field condition. Actual results depend on substrate stability, installation quality, and the complete tile assembly.
Temperature and site conditions Install and cure within the temperature and environmental limits stated for the materials. Protect the work from conditions that could disrupt application or curing. Suitable site conditions help materials bond and cure as intended. Cold, heat, high humidity, direct sun, or poor ventilation may change working and curing times. Use the product-specific limits.

General note: Crack-isolation membranes address limited in-plane substrate movement; they are not a repair for structural defects. Confirm the crack’s cause and follow the membrane manufacturer’s current technical instructions, relevant standards, and project specifications.

Resources

Copyright © CUSTOM Building Products 2025
Products | Resources | Interactive Tools | Warranties | Privacy Policy | Terms of Use | Technical Training