Why Use a Shower Waterproofing Membrane?

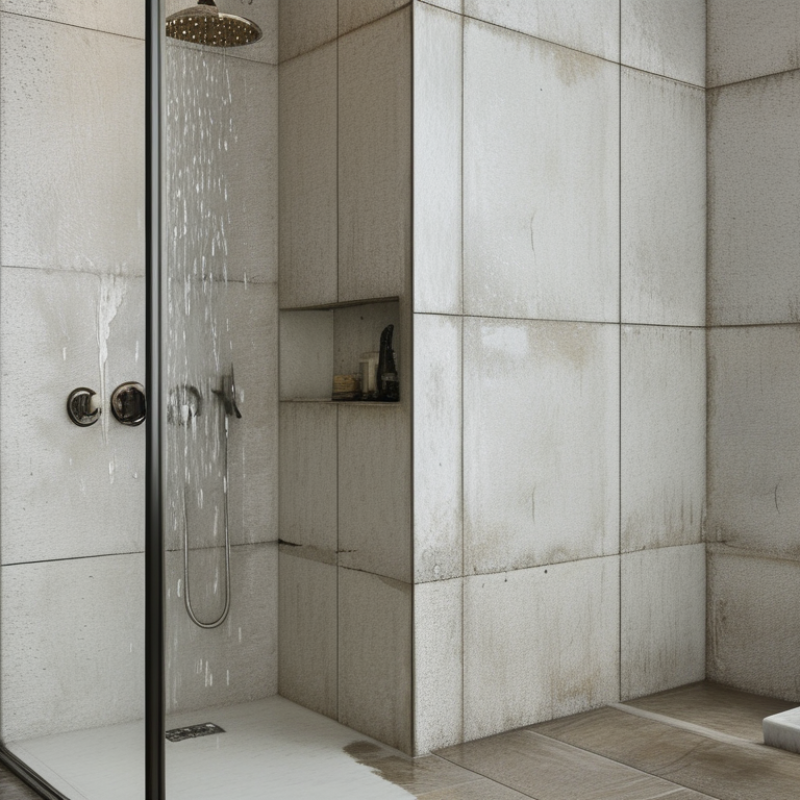
A shower can look flawless while moisture quietly travels behind its tiles. Grout lines, corners, pipe penetrations, and bench joints create vulnerable paths. Once water reaches drywall or framing, stains, swelling, mold, and costly repairs may follow. This is why a shower waterproofing membrane matters. It creates a continuous barrier beneath the finished surface, where leaks are difficult to see and even harder to correct.

Tile industry educator John Bridge captures the practical lesson: “Tile is not waterproof.” His observation remains important for homeowners and installers. Porcelain and ceramic tiles resist water, but their joints and surrounding layers do not create a complete waterproofing system. A properly selected shower waterproofing membrane helps protect the substrate, especially around niches, curbs, drains, and wall-to-floor transitions. Those small details often decide whether a shower remains durable.

The installation still requires care. Membrane seams must overlap or seal according to the manufacturer’s instructions. Corners need consistent coverage. The drain connection must be compatible. A flood test can reveal problems before tile conceals them. Local building requirements should also guide the work.

It is not a magic shield.

An experienced installer checks the substrate, controls thickness, and respects curing times. Even then, perfection is difficult. Products can fail when rushed, poorly stored, or used outside their approved system. That uncomfortable truth deserves attention. Choosing a reputable membrane, following tested procedures, and documenting the installation offers stronger protection than relying on attractive tile alone. The goal is simple: keep water in the shower and away from the structure.
Why Use a Shower Waterproofing Membrane?

What Is a Shower Waterproofing Membrane?

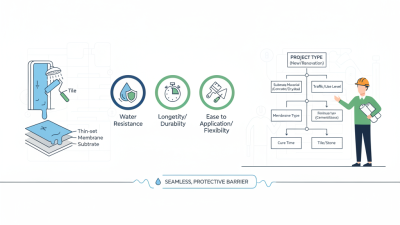
A shower waterproofing membrane is a continuous water-control layer installed beneath tile and mortar. It may be a flexible sheet or a liquid-applied coating. Its job is simple: stop water before it reaches framing, insulation, and wallboard. Tile and grout are water-resistant, not waterproof. That distinction matters. The Tile Council of North America (TCNA) Handbook places waterproofing within the shower assembly, especially around corners, joints, and drains. The U.S. Environmental Protection Agency also reports that mold can begin growing within 24 to 48 hours after moisture exposure. A membrane reduces that opportunity, but only when its seams and transitions are properly sealed.

Details decide performance. The membrane must connect continuously to the shower drain, curb, niches, and control joints. A small unsealed corner can undermine an otherwise careful installation. ASTM waterproofing standards, including ASTM C836 and ASTM C1471, emphasize material performance and proper application conditions. Still, standards cannot correct poor surface preparation. The wall must be clean, stable, and sufficiently dry. In practice, rushing this stage is tempting. It is also a mistake worth reconsidering.

Tips: Check the membrane’s thickness, coverage, and curing instructions. Photograph corners before tiling. Flood-test the shower when the system allows it. Do not rely on grout color or surface appearance to confirm waterproofing. A membrane hidden behind tile deserves more inspection, not less.
How Does a Shower Waterproofing Membrane Work?

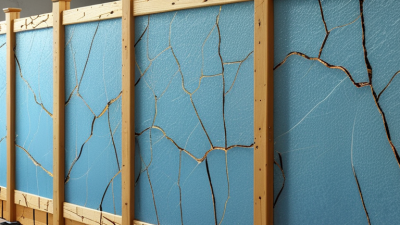
A shower waterproofing membrane creates a continuous barrier behind the tile surface. It keeps liquid water from reaching the wall framing, insulation, and floor structure. Tile and grout resist water, but neither forms a dependable waterproof system alone. Moisture can enter through grout joints, corners, screw holes, and small cracks.

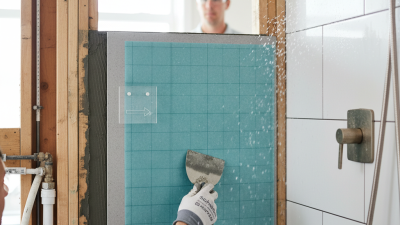
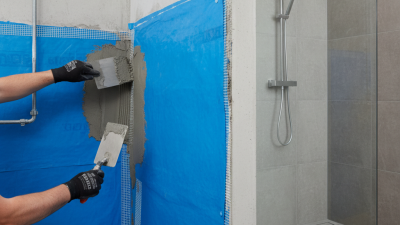
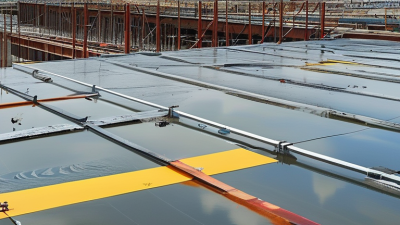
The membrane works by directing water toward the drain instead of allowing it to soak into the substrate. Sheet membranes are bonded to the prepared surface with compatible mortar or adhesive. Liquid membranes are brushed or rolled on, then cured into a flexible film. Each layer needs full coverage. Thin spots can become weak points. Overlaps, inside corners, pipe openings, and drain connections require careful sealing.

Installation details matter most. A clean, flat substrate helps the membrane bond properly. Dust can prevent adhesion. Poorly sealed fasteners may create hidden leaks. On site, installers often use a flood test before covering the shower floor, where local requirements allow it. The test can reveal slow drainage or a failed connection. A small pinhole may look harmless, yet water can travel behind tile for months. It is easy to trust a neat surface too much. Even experienced workers should inspect seams twice, especially around the drain and curb. The membrane must also remain compatible with the mortar, tile, and drainage assembly used in the shower.

Which Shower Areas Need Waterproofing Protection?

Why Use a Shower Waterproofing Membrane?

Which Shower Areas Need Waterproofing Protection?

More homeowners now expect practical, comfortable showers. The National Association of Home Builders’ 2024 survey found that 78% of buyers considered a primary-bath shower stall essential or desirable. That demand raises one difficult question: which surfaces truly need waterproofing?

Every shower floor needs continuous protection beneath the tile. Water can sit around the drain, curb, or threshold, especially after a long shower. Shower walls also require coverage, not only the lower sections. Splashing reaches corners, niches, benches, and plumbing openings. These small transitions often fail first. According to the U.S. Environmental Protection Agency’s WaterSense program, household leaks can waste more than 10,000 gallons annually. A concealed shower leak may not appear quickly, but the damage can spread through framing and adjacent rooms.

Protect the curb, wall-to-floor joints, inside corners, and membrane connections around valves and showerheads. Niches deserve extra attention because their horizontal surfaces collect water. The drain connection must remain securely integrated with the waterproofing layer. Grout is not waterproof. Many installers still treat it as the main defense, which is an understandable mistake, but not a reliable system. Tile may look dry while the substrate stays damp. That detail deserves more respect.

A sound installation needs compatible materials, correct overlaps, and careful inspection before tiling. Even experienced workers can miss one penetration.

Why Use a Shower Waterproofing Membrane?

Which shower areas typically need waterproofing protection?

A waterproofing membrane is typically required on shower floors, shower walls, curbs, benches, niches, drains, and other penetrations because these areas are exposed to regular water or can allow moisture to reach the underlying structure. A standard shower ceiling is not normally treated as a wet area, but steam showers require additional ceiling protection. Local building codes and membrane manufacturer instructions should always be followed.

What Are the Main Benefits of Using One?

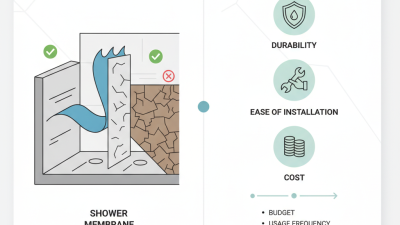
A shower waterproofing membrane creates a continuous barrier behind tile, where grout alone cannot reliably stop water. In remodeling work, this layer protects wall boards, floor assemblies, and nearby framing from repeated moisture exposure. Water may enter through tiny cracks, movement joints, or poorly sealed pipe openings. The membrane directs that moisture away from vulnerable materials.

Its main benefit is damage prevention. It can reduce swelling, staining, mold-friendly dampness, and expensive repairs inside walls. It also supports long-term tile performance because a dry substrate is less likely to shift or weaken. Many membranes are thin, preserving usable shower space while covering corners and transitions. Proper overlap matters. So does the drain connection. A small gap can defeat a carefully installed system.

Good results depend on preparation, not only the membrane. The surface should be clean, stable, and suitably flat before installation. Installers must follow curing times and seal penetrations around valves, benches, and niches. I have seen attractive showers fail because waterproofing stopped above the showerhead. That mistake is easy to miss. Visual checks during installation are valuable, although they cannot replace local building requirements or qualified inspection. Waterproofing also needs a slope toward the drain; standing water tests both materials and workmanship.

Why Use a Shower Waterproofing Membrane? - What Are the Main Benefits of Using One?
Benefit or Performance Area How the Membrane Works Practical Shower Benefit Typical Technical Consideration What to Check Before Installation
Controls Water Penetration A continuous membrane forms a water-resistant layer behind tile, grout, and other shower finishes. Reduces the risk of moisture reaching framing, insulation, and adjacent rooms. Membranes intended for tiled showers are commonly evaluated under ANSI A118.10, the standard for load-bearing, bonded, waterproof membranes. Confirm that the selected product is approved for shower and wet-area use and that all seams, corners, penetrations, and transitions are treated as specified.
Protects the Substrate The membrane separates the shower's water-exposed finish system from cement board, gypsum-based backers, mortar beds, or other approved substrates. Helps limit swelling, deterioration, staining, and microbial growth caused by repeated moisture exposure. Protection depends on a fully continuous system; an unsealed screw, pipe penetration, or damaged section can become a leakage path. Use only substrates permitted by the membrane manufacturer and repair surface defects before applying or placing the membrane.
Manages Cracks and Limited Movement Some flexible membranes can bridge small, non-structural cracks and accommodate limited movement between compatible layers. May reduce the chance that minor substrate movement transfers directly into the tile covering. Crack-bridging performance varies by product and installation method; it does not correct structural movement or unstable framing. Review the product's tested crack-bridging or movement capability and provide movement joints where required by the tile installation standard.
Creates a More Reliable Drain Connection When integrated correctly, the membrane directs water toward the drain assembly rather than allowing it to collect below the shower surface. Improves the likelihood that incidental water is captured and discharged through the drainage system. Drain compatibility is essential. Bonded waterproofing systems generally require a compatible drain flange or clamping arrangement. Check flange type, membrane-to-drain connection, weep-hole protection, slope, and the required sealant or bonding method.
Supports Faster Installation Options Sheet membranes are typically installed as preformed layers, while liquid-applied membranes are brushed or rolled onto the prepared surface. Can simplify waterproofing compared with relying on multiple coats of conventional moisture-resistant materials. Liquid-applied products require the specified wet-film or dry-film thickness and may require drying between coats. Sheet systems require properly overlapped or sealed joints. Follow the stated coverage rate, thickness, curing time, temperature range, and substrate moisture requirements.
Reduces Dependence on Grout as the Waterproofing Layer The membrane provides the primary waterproofing layer behind the finish; grout mainly fills joints and contributes to the finished appearance. Limits the consequences of grout cracking, pinholes, or normal grout porosity. Tile and grout assemblies are not automatically waterproof. Cementitious grout is generally porous unless modified or sealed, and sealers do not replace a membrane. Install the membrane continuously before tiling and maintain properly sized, flexible sealant joints at changes of plane.
Improves Long-Term Maintenance Potential By limiting moisture migration behind the tile assembly, the membrane helps protect concealed building components that are difficult to access. May reduce the likelihood of hidden water damage and disruptive repairs when the entire system is correctly designed and installed. Waterproofing does not prevent failures caused by poor slope, blocked drains, damaged sealant joints, loose tiles, or plumbing leaks. Inspect sealant joints, drain areas, grout condition, and plumbing connections periodically, especially at corners and penetrations.
Provides Design Flexibility Waterproofing membranes can be used beneath many tile layouts when paired with approved substrates, adhesives, drains, and accessories. Allows showers to use large-format tile, niches, benches, curbs, and other features without abandoning a continuous waterproofing strategy. Complex details require compatible preformed corners, banding, collars, or liquid detailing materials to maintain continuity. Prepare a waterproofing layout before installation and identify every corner, niche, bench, curb, pipe, fastener, and drain transition.
Supports Quality-Control Testing A properly installed shower waterproofing system can be inspected before it is concealed by tile and trim. Defects can be identified earlier, when repairs are usually easier and less costly. Flood-testing requirements vary by jurisdiction and system. Many shower assemblies are tested before tile installation, commonly for approximately 24 hours where permitted. Follow local plumbing regulations and the membrane system instructions. Protect the test area and verify that the drain and waterproofing details are complete.
Helps Address Vapor and Moisture Conditions Some membranes provide low vapor permeance in addition to liquid-water resistance, while others are designed primarily for waterproofing. Can help manage moisture movement in high-humidity areas when the selected assembly is suitable for the building conditions. Waterproofing and vapor control are different properties. A vapor-retarding layer may be required in some climates or shower configurations and can be inappropriate in others. Check the membrane's vapor permeance classification, local code requirements, wall assembly design, and whether another vapor retarder is already present.
Important: A shower waterproofing membrane is only one part of a complete wet-area system. Performance depends on compatible materials, correct substrate preparation, adequate drainage slope, sealed penetrations, properly treated movement joints, and compliance with local building and plumbing requirements.

How Is a Shower Waterproofing Membrane Installed?

A shower waterproofing membrane is installed before tile, not after the first leak. The process begins with a firm, clean substrate. Remove dust, oil, loose mortar, and sharp edges. The shower floor should slope toward the drain, commonly 6 millimeters per meter, or 1/4 inch per foot. Standing water is a warning sign.

Measure carefully around corners, niches, benches, and pipe openings. Cut sheet membrane with clean edges, or apply liquid membrane at the required thickness. Use a wet-film gauge for liquid products. Press out air pockets beneath sheet material. Seal every joint, corner, and penetration with compatible accessories. The drain connection needs special attention. A small gap there can damage framing quietly. ANSI A118.10 covers load-bearing, bonded waterproof membranes for thin-set tile systems. Follow its requirements and the membrane manufacturer’s instructions.

Tips: Perform a flood test before tiling. Many plumbing standards use 24 hours as a practical test period, but local requirements can differ. Mark the water level and inspect the room below. The U.S. Environmental Protection Agency reports that household leaks waste nearly 1 trillion gallons of water yearly. That figure concerns plumbing leaks, not membranes, yet it shows how unnoticed moisture becomes expensive. I once treated a niche corner as minor work. It was not. Check it twice, photograph the seams, and allow full curing time before covering the surface.

Resources

Copyright © CUSTOM Building Products 2025
Products | Resources | Interactive Tools | Warranties | Privacy Policy | Terms of Use | Technical Training