How to Choose an Uncoupling Membrane in 2026?

Choosing an uncoupling membrane in 2026 requires more than comparing product prices or thicknesses. A reliable decision begins with the project itself. Consider the substrate, tile format, room size, moisture exposure, heating system, and expected movement. A bathroom floor near a shower needs different protection from a dry residential hallway. Large-format porcelain can also expose weak preparation quickly. Small details matter.

Practical experience shows that installation conditions often decide performance. Check whether the concrete is clean, flat, cured, and structurally sound. Confirm the membrane’s approved substrates and compatible mortars. Review technical data, test reports, coverage rates, and installation instructions from established manufacturers. Independent certification can provide useful confidence, but it should not replace careful site evaluation. Speak with experienced installers when the project includes cracks, timber structures, balconies, or radiant heating.

There is no universal membrane.

A suitable product should help manage stresses between the substrate and tile assembly. It may also support waterproofing, sound reduction, or heat distribution, depending on its design. These functions must be verified, not assumed. Some product descriptions sound impressive, yet they may not match your installation conditions. That is where judgment becomes important. Recheck the details. Ask what happens if the substrate moves beyond the tested range, or if installation occurs in cold, damp weather. The best choice balances engineering evidence, installer skill, long-term reliability, and the actual risks beneath the finished surface.

How to Choose an Uncoupling Membrane in 2026?

Define Movement Risk: Compare ANSI A118.12 Results at 1/16- and 1/8-Inch

How to Choose an Uncoupling Membrane in 2026?

Movement risk should guide membrane selection, not habit or a low purchase price. ANSI A118.12 results provide a useful comparison. A membrane passing the 1/16-inch test may suit stable interior floors with limited movement. A 1/8-inch result indicates greater tested crack-isolation capacity. That difference matters over concrete joints, heated floors, large tile layouts, and areas with temperature changes. Still, the test is not a promise that every installation will remain crack-free. Confirm the tested assembly, tile size, substrate condition, and installation requirements.

Tips: Ask for the complete ANSI A118.12 test report, not only a marketing claim. Check whether the result applies to 1/16 or 1/8 inch movement. Measure cracks and observe slab moisture before choosing. A clean surface is essential. So is correct mortar coverage. Small installation errors can defeat a strong test result.

I have seen projects focus on membrane thickness while ignoring structural movement. That approach feels practical, but it can be misleading. The 1/8-inch rating may justify extra protection, yet it cannot repair an unstable substrate or replace movement joints. Review the project’s exposure, joint layout, and expected traffic with a qualified tile professional. Sometimes the safer choice is not the strongest-looking membrane. It is the system that matches the floor, the installation team, and the actual movement risk.

How to Choose an Uncoupling Membrane in 2026?

Define Movement Risk: Compare ANSI A118.12 Results at 1/16- and 1/8-Inch

ANSI A118.12 evaluates crack-isolation performance at defined substrate movement levels. 1/16 inch equals 1.5875 mm and represents the standard-performance movement level; 1/8 inch equals 3.175 mm and represents the high-performance movement level. These values are test benchmarks, not product-specific test results.

Check Substrate Flatness: Meet ANSI A108.02 Limits of 1/8 Inch in 10 Feet

How to Choose an Uncoupling Membrane in 2026?

Check Substrate Flatness: Meet ANSI A108.02 Limits of 1/8 Inch in 10 Feet

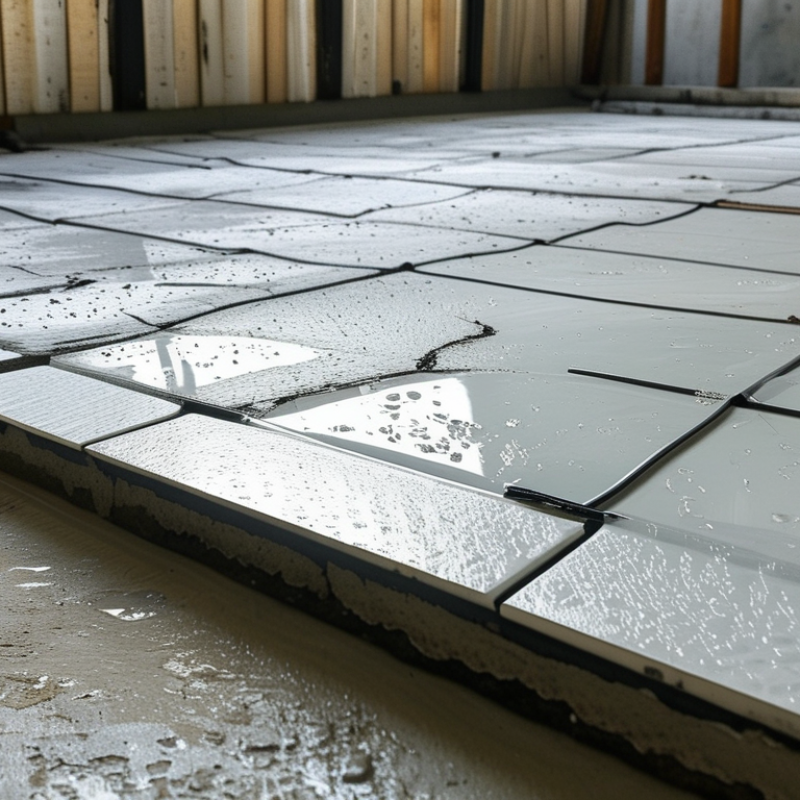
Before choosing an uncoupling membrane, inspect the substrate with a ten-foot straightedge. ANSI A108.02 commonly limits variation to 1/8 inch in 10 feet for large-format tile installations. This requirement matters because a membrane can reduce stress transfer. It cannot correct major ridges, dips, or sudden transitions.

Measure in several directions. Mark every hollow spot with a pencil. A bright work light can reveal shallow waves that normal lighting hides. Remove dust before checking, since loose debris can create false readings. Small corrections may require patching or grinding before membrane installation.

Do not rely on the membrane to hide poor preparation. That mistake is expensive. I have seen smooth-looking floors fail because installers checked only the room’s center. Perimeters often contain the worst variation. Also verify the current project specification, tile size, and installation instructions. The 1/8-inch limit may not apply identically to every tile format or layout.

A careful flatness check improves membrane selection. It also exposes when a thicker leveling approach is more appropriate. Sometimes the best choice is not the fastest one.

Assess Moisture Control: Review ASTM E96 Vapor-Transmission Test Data

How to Choose an Uncoupling Membrane in 2026?

Moisture control begins with the ASTM E96 vapor-transmission report, not the product photograph. The test measures permeance in perms, showing how much water vapor passes through a membrane. Under the International Residential Code, Class I materials measure 0.1 perm or less, while Class II materials exceed 0.1 and reach 1 perm. A membrane rated at 0.5 perms therefore slows vapor movement, but it does not create a waterproof room.

Read the test conditions carefully. ASTM E96 includes desiccant and water methods, with different humidity gradients. Results can change with test direction, temperature, thickness, and edge sealing. The Tile Council of North America Handbook advises designers to match membrane selection with substrate moisture, drainage, and tile assembly conditions. That advice matters on a cool concrete slab, where vapor may condense beneath a dense tile surface. One missed detail can become a hollow sound, discoloration, or bond failure. I would not compare two permeance values until their test methods match.

Tips: Request the complete ASTM E96 report. Check the method, specimen thickness, and stated perm value. Compare it with ASTM F2170 or F1869 slab-moisture data when concrete is involved. Do not assume a low perm rating solves liquid-water problems. It does not. Field judgment remains necessary, and honestly, laboratory results never capture every jobsite variable.

Compare Membrane Specs: Analyze Thickness, Coverage, and Load Ratings

How to Choose an Uncoupling Membrane in 2026?

Choosing an uncoupling membrane starts with the real demands of the floor. Thickness affects movement management, height transitions, and installation comfort. A thicker membrane is not automatically stronger. Check whether its structure supports the expected tile size and substrate movement. Load ratings deserve close attention. A published rating should explain testing conditions, load type, and allowable deflection. Point loads from furniture legs can behave differently from evenly distributed loads. On site, these details matter.

Coverage is easy to underestimate. Measure the floor, then account for cuts, wall edges, columns, and pattern changes. Roll width can reduce seams, but wider rolls may create handling problems in small rooms. Confirm overlap requirements and calculate usable coverage, not only the package area. A small error can leave an exposed joint. That is an avoidable weakness.

Tips:

Compare thickness, coverage, and load ratings in one table. Ask for test data, installation limits, and substrate requirements. Inspect the floor for dust, moisture, cracks, and uneven areas before installation. I would not select a membrane by price alone. That shortcut sometimes fails. A practical choice balances movement control, finished height, handling, and verified performance. Recheck every transition at doorways and drains. Those locations often reveal poor planning.

Verify Installation: Follow ANSI A108.10 Procedures and Manufacturer Cure Times

When choosing an uncoupling membrane in 2026, verify its installation requirements before comparing features. ANSI A108.10 governs grout installation, not every membrane detail. Use it at the grouting stage, while following the membrane manufacturer’s written instructions for substrate preparation, bonding, and cure time. This distinction matters.

A professional checklist should record substrate condition, temperature, humidity, mortar coverage, and waiting periods. Check the slab or backer board for dust, movement, and visible moisture. Press the membrane firmly into fresh mortar, then lift a corner to inspect contact. Empty areas beneath the sheet can become weak points. Allow the mortar to cure for the stated period before setting tile. Do not rely on a surface that merely feels dry.

The 2024 Houzz U.S. Bathroom Trends Study reported that 84% of homeowners hired professionals for bathroom projects. That figure reinforces the value of documented installation checks, especially in wet areas. Keep photographs of seams, corners, fasteners, and movement joints. Record the actual room temperature. Cure times can change with cold, damp conditions.

I have seen schedules push grout work too early. It seemed harmless. It was not. A better inspection uses the longer cure time when conditions are uncertain. ANSI A108.10 procedures should guide grout placement, joint filling, cleaning, and final inspection. Manufacturer instructions should control membrane-specific limits, even when the schedule becomes inconvenient.

How to Choose an Uncoupling Membrane in 2026? — Verify Installation: Follow ANSI A108.10 Procedures and Manufacturer Cure Times

A practical comparison and installation-verification guide for selecting an uncoupling membrane without relying on brand-specific data.

Evaluation Dimension What to Verify Typical or Required Information Why It Matters Installation Record
Intended Function Confirm that the sheet is designed for uncoupling, crack isolation, waterproofing, or a defined combination of functions. Use only the performance claims and applications stated in the current technical data sheet. A membrane marketed only for crack isolation should not automatically be treated as a waterproofing layer. Application approved: Yes / No
Applicable Tile-Membrane Standard Check whether the product has documented test results against the applicable membrane standard. For crack-isolation membranes, review the declared classification or test results under ANSI A118.12 where applicable. Standardized testing provides a more reliable basis for comparing performance than thickness or marketing terminology alone. Standard and classification recorded
Substrate Compatibility Verify approval for concrete, cement backer board, plywood, gypsum-based underlayment, or other proposed substrates. Substrate must be structurally sound, clean, dry as specified, and within the manufacturer’s flatness and moisture limits. Incorrect substrate selection can cause bond loss, telegraphing, cracking, or movement-related tile failure. Substrate and preparation method recorded
Substrate Flatness Measure the floor before installation using a straightedge or equivalent method. For large-format tile, common industry guidance is approximately 1/8 inch in 10 feet and 1/16 inch in 24 inches, subject to the governing specification. An uncoupling membrane is not a substitute for correcting excessive substrate variation. Measured deviation: __________
Membrane Thickness and Format Record the nominal thickness, sheet or roll dimensions, and joint configuration. Thickness varies by product type; compare only values measured by the same method and confirmed in the technical data sheet. Thickness affects transitions, detailing, coverage, and compatibility with adjacent finished surfaces. Thickness: ______   Format: ______
Mortar Selection Use the mortar type and classification specified for the substrate, membrane, and tile. Record the applicable ANSI A118 mortar classification, such as A118.1, A118.4, or A118.15, when specified. Mortar chemistry and working characteristics influence bond strength, open time, and curing beneath the membrane. Mortar classification recorded
Coverage Beneath Membrane Lift test sections during installation to check mortar transfer and eliminate voids. Coverage must meet the project specification; wet areas and exterior applications generally require more complete coverage than dry interior areas. Insufficient contact can create unsupported areas, movement, and localized tile stress. Coverage verified: Yes / No
Seam and Perimeter Detailing Follow the approved method for abutting, overlapping, sealing, or reinforcing membrane joints and penetrations. Use the membrane system’s specified accessories and joint treatment; do not improvise with unapproved tapes or sealants. Seams, corners, drains, and penetrations are common locations for water migration and installation defects. Details inspected and photographed
Movement Joints Locate and continue structural, perimeter, and field movement joints through the tile assembly as required. Follow the project movement-joint design and applicable tile-installation requirements; do not bridge structural joints with a membrane. Membranes cannot eliminate movement that must be accommodated by a properly designed joint. Joint layout approved: Yes / No
Open Time Check that mortar remains transferable before embedding the membrane. Open time depends on temperature, humidity, substrate absorption, air movement, and mortar type; use the current mortar data sheet. Installing over skinned or partially cured mortar can reduce bond and create hollow areas. Ambient conditions recorded
Membrane-to-Mortar Cure Observe the specified waiting period before heavy traffic, grouting, or tile installation when required. Do not use a generic cure time. Follow the membrane and mortar manufacturer’s stated cure time, which may range from same-day installation to approximately 24–72 hours depending on system and conditions. Premature loading can disturb the membrane, weaken the bond, or cause tile displacement. Required cure: ______   Actual cure: ______
Tile Installation Over Membrane Confirm whether tile may be installed immediately or only after the membrane assembly has cured. Use the exact system instructions for tile size, mortar type, trowel selection, directional combing, and back-buttering. Large-format and heavy tile require consistent support and may need additional handling precautions. Tile size and method recorded
Grouting Procedure Apply grout only after the tile-setting material has reached the required cure stage. ANSI A108.10 addresses the installation of grout in tilework; follow its applicable procedures together with the grout manufacturer’s instructions. ANSI A108.10 is a grout-installation reference, not a substitute for the membrane manufacturer’s installation and curing instructions. Grout type and start time recorded
Grout Mixing and Application Control water addition, slaking, remixing, joint filling, cleaning, and final cure. Use measured water, observe the stated slake time where applicable, and avoid over-washing or adding water during cleanup. Excess water and improper cleanup can cause color variation, pinholes, weak joints, and surface erosion. Mixing and cleaning checks completed
Temperature and Humidity Record conditions during substrate preparation, membrane placement, tile setting, and grouting. Cure times generally increase in cool, damp, or poorly ventilated conditions and decrease in warm, dry, or windy conditions. Environmental conditions directly affect mortar open time, bond development, and grout cure. Temperature: ______   RH: ______
Traffic Protection Restrict foot traffic and rolling loads until the complete assembly reaches the specified cure stage. Use rigid protection that will not puncture or shift the tile assembly; follow the system’s stated light-traffic and full-traffic times. Early traffic is a frequent cause of displaced tile, cracked grout, and disturbed membrane seams. Protection installed: Yes / No
Moisture and Waterproofing Verification Determine whether the project requires a waterproof membrane system rather than an uncoupling-only system. Review shower, wet-room, balcony, and exterior requirements separately; confirm flood-testing requirements where applicable. Uncoupling performance and waterproofing performance are different properties and must be verified independently. Waterproofing requirement: ______
Documentation Retain the current technical data sheet, installation instructions, lot information, mortar data, and site-condition log. Document product type, substrate, mortar, installer, installation date, cure periods, and inspection results. Complete records make it possible to verify that the selected system was installed according to its published requirements. Documents complete: Yes / No

Important verification note: Cure times are system-specific. Always follow the latest manufacturer-published instructions for the exact membrane, mortar, grout, substrate, temperature, humidity, and traffic condition.

Standards note: ANSI A108.10 concerns grout installation procedures. Membrane selection and performance should also be checked against the applicable membrane, mortar, substrate, movement-joint, and waterproofing requirements for the project.

Resources

Copyright © CUSTOM Building Products 2025
Products | Resources | Interactive Tools | Warranties | Privacy Policy | Terms of Use | Technical Training